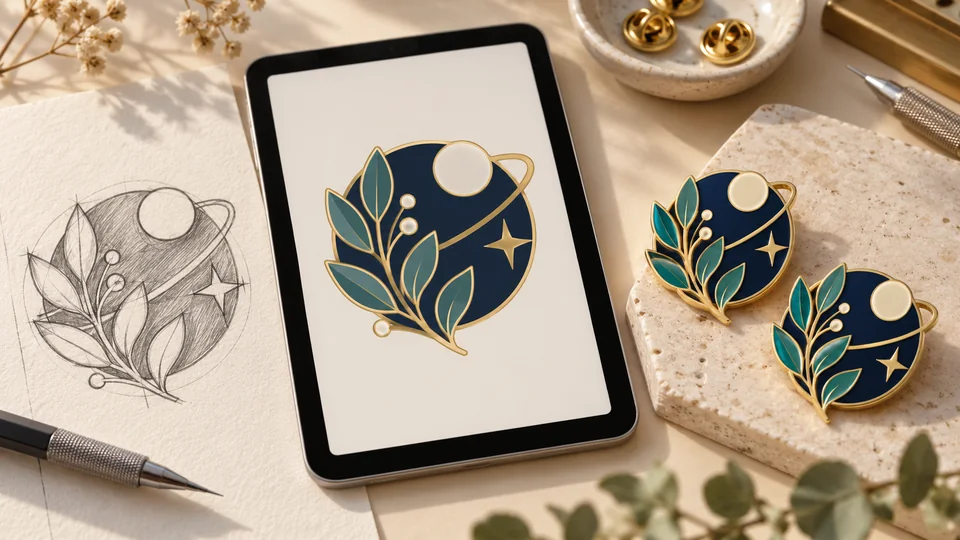
Short answer: treat AI as a concept tool, not as the final production file. A successful AI enamel pin design still needs deliberate linework, closed color shapes, a confirmed size, a suitable manufacturing method and a factory proof that you check before production.
That distinction is timely for branded merchandise teams. In its October 2026 study of 257 end buyers and 250 agency respondents, PPAI Research found that 41% of end buyers thought AI could help find better merchandise ideas, while 32% saw a role in personalizing campaigns. Those are reported expectations—not evidence that an AI image is ready for a factory. The useful opportunity is to generate directions faster, then apply manufacturing judgment before you order.
What AI is good at—and what it tends to miss
Generative tools can quickly suggest themes, silhouettes, moods and color palettes. They are useful for brainstorming a mascot, commemorative symbol or campaign motif before you commit to a final direction. They can also show how a pin might look on a jacket or backing card.
But zoom in and inspect the actual artwork. AI images can contain misspelled words, inconsistent letter shapes, near-touching outlines, decorative marks that do not connect cleanly and tiny highlights that disappear at pin scale. A realistic mockup may also imply gradients, shadows or surface effects that are not part of the actual enamel artwork. These are concept-stage signals, not factory specifications.
Write down the design’s non-negotiables before generating: approved logo or symbol, intended wearer, target size, a small color palette and any required wording. Avoid asking the image model to create exact brand text; add approved lettering later in editable design software and check every character yourself.
A practical workflow for production-ready pin artwork
1. Generate a direction, not a finished file
Ask for one clear central motif, a simple outer shape and a limited set of solid colors. For an enamel pin, useful prompt language might be: “Create a compact lapel-pin concept with one central emblem, four flat color areas, a clean metal outline, no gradients, no texture and no lettering.” Generate a few directions, select one, and keep the original image as a visual reference.
Do not mistake a detailed prompt for a production brief. Record the intended width and height, whether the artwork is soft or hard enamel, preferred metal finish, approximate quantity and attachment. These choices affect what details make sense. Our soft vs. hard enamel guide explains the different surface results.
2. Simplify the design at its real size
Set the pin’s finished dimensions before refining detail. A tiny symbol, hairline border or three-line slogan that looks clear on a large screen may close up when reduced to a 25–35 mm pin. Print the artwork at 100% scale or view a correctly sized proof on screen. Ask: can someone recognize the main idea quickly, and can every important detail still be seen?
Remove details that do not help recognition. Turn photographic shading into a few purposeful shapes; enlarge important gaps; reduce decorative specks; shorten copy; and use negative space instead of outlining every small feature. If the design depends on a person’s name or date, consider whether that belongs on the custom lapel pin itself or on a presentation card where it can remain more legible.
For example, a hypothetical AI concept for a 30 mm “space fox” pin might show fur strokes, star fields, a tiny mission slogan and several metallic gradients. A manufacturable revision could keep the fox silhouette, one planet and three or four solid colors, then move the slogan to the backing card. The goal is to preserve the concept’s identity—not every pixel in the generated image.
3. Convert the concept into editable shapes
A raster image such as PNG or JPEG is made of pixels; a vector drawing contains editable paths. Vector artwork helps a designer or factory adjust dimensions, inspect boundaries and separate color areas. Adobe’s official Illustrator Image Trace guide explains how to convert raster artwork into editable vector paths. Tracing is a starting point: expand and clean up the paths, remove stray nodes, correct shapes and rebuild details that the automatic trace handled poorly.
Ask your chosen manufacturer which file types it accepts. Editable AI, EPS, SVG or vector PDF files are often convenient, but a clear reference image or sketch may also be enough for an art team to prepare the production version. The important thing is to inspect the final proof, not simply to exchange a file with a particular extension.
In other words, enamel pin design file requirements are not just a list of extensions: the artwork also needs a confirmed size, understandable color boundaries and a proof that reflects the intended construction. Keep the original concept and the approved production version together.
4. Make each color area and metal boundary intentional
For traditional enamel construction, color sits in defined recessed areas and metal separates neighboring fields. Close every color shape, make the metal borders continuous where they are meant to divide enamel, and check that no tiny island of color is trapped between hairline gaps. Gradients and soft shadows usually need to be simplified into solid colors; if you want fine photographic detail, ask whether a printed finish is more appropriate.
Manufacturing limits vary with the process, design size, metal and supplier. As one concrete reference, WizardPins’ artwork guide lists 0.2 mm minimum metal lines, 0.3 mm minimum color areas and 5 pt text for its guidance. Treat those as that supplier’s published specifications—not universal tolerances. Send the actual dimensions to your manufacturer and ask it to flag any line, gap or letter that needs revision. The size and thickness guide can help you think through scale and weight.
5. Specify colors, metal finish and the back
Screen colors vary across devices. Where color accuracy matters, provide brand-approved references and ask the manufacturer to confirm a practical enamel match. Call out the plating separately—such as bright gold, silver or antique metal—because the exposed metal is part of the design. See our plating finish comparison when choosing a look.
Include the pin’s outside dimensions, orientation, backing preference, post count and approximate positions. If the artwork must work with a branded backing card, supply that layout too. For an order quote, note the quantity and packaging plan; the custom enamel pin cost guide explains how size, quantity, colors, backing and packing can affect the overall project.
For custom lapel pin artwork, include a clean front design and separate notes for plating, dimensions and the back attachment. This keeps visual instructions distinct from production choices the factory needs to confirm.
6. Review the final proof at 100% before approval
A digital proof is where a concept becomes a specific production instruction. Compare it against the brief and review it at the final physical size—not only zoomed in. Check:
- Spelling, numbers, logo proportions and the outside cut shape.
- Every enamel color, its boundary and the intended exposed metal.
- Small lettering, narrow gaps, thin lines and crowded details.
- Finished width and height, orientation, plating and backing position.
- Any printed detail, special effect, backing card or packaging instruction.
Return a single marked-up proof with specific requested changes, then review the corrected version. If appearance, color or surface height is important to the project, ask whether a physical sample is available and what it will confirm. Our metal badge manufacturing guide outlines what follows artwork approval. Keep the approved proof and version date with the order so a reorder has a reliable reference.
Production-ready artwork checklist
Before requesting a final quote or approving a pin proof, gather:
- The original AI image or sketch, plus the selected simplified direction.
- Finished width and height, intended use and estimated quantity.
- Editable vector artwork if available; otherwise, the clearest source image you have.
- Approved wording and logo files, with required colors or brand references.
- Preferred enamel type, metal plating, backing, post layout and packaging.
- A manufacturer-reviewed proof at actual size and a written approval of the final version.
If you only have an AI image, you can still begin. Share it as a concept reference and ask what needs simplifying before production. Use the custom badge design page to outline a brief, or contact BadgeCraft for an artwork review.
Frequently asked questions
Can I send an AI-generated image to a pin manufacturer?
Yes—as a concept reference. Include the target size and intended finish, and ask whether the art team can prepare production artwork. Review the resulting proof carefully before approving manufacturing.
Does an AI enamel pin design have to be a vector?
Not necessarily for the first conversation. Vector paths are useful for precise editing, but suppliers may accept a high-resolution image or sketch as a starting point. Confirm the factory’s file requirements and proofing process.
Can an enamel pin reproduce gradients and tiny details?
Traditional enamel works best with solid, clearly separated shapes. A gradient or small detail might be simplified, omitted or assigned to a printing process. The result depends on the design, finished size and manufacturer, so confirm it on the proof.
What should I check before approving a pin proof?
Check every word, color boundary, metal line, outer shape, dimension, plating finish and backing position at actual size. Make sure all requested changes appear in the latest version, and keep that approved proof with your order record.
Sources and further reading
The market context above comes from PPAI Research’s October 2026 article, “Better Merch Is Better Marketing.” Artwork workflow details are informed by Adobe’s Illustrator Image Trace documentation and WizardPins’ enamel pin design guide. Supplier measurements are examples only; confirm the specifications for your chosen process and finished size.