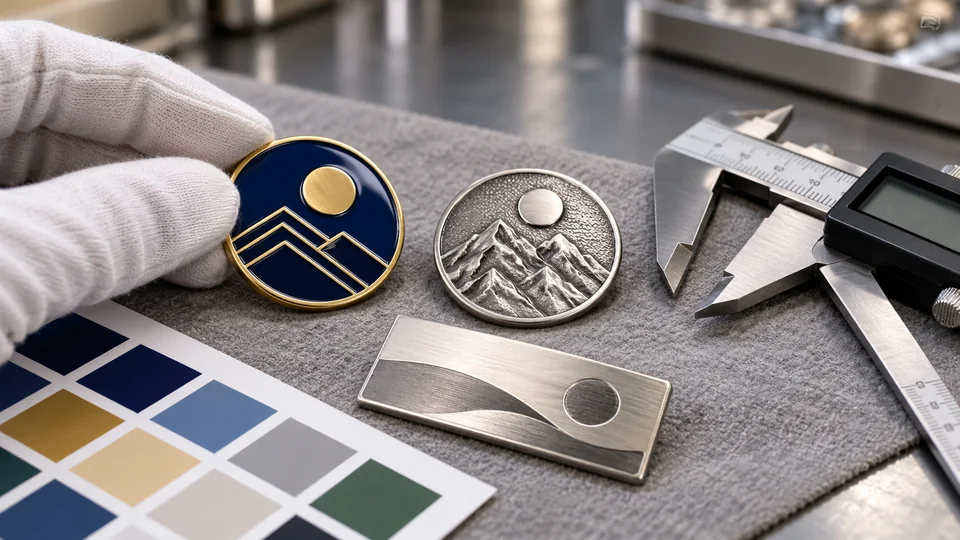
Short answer: approve a custom metal badge sample only after comparing it with the latest approved artwork and written specification. This custom metal badge quality checklist keeps the review grounded in observable details: check shape and orientation, dimensions, edges, relief, plating, enamel colors, reverse details, attachment position and function, garment fit and packaging. Record the result, the sample revision and any accepted variation in writing. A physical sample helps you judge the finished object; a signed approval record tells the production team which version to follow.
Why a metal badge sample deserves a careful review
A digital rendering can show the general idea, but it cannot fully communicate how the finished badge catches light, feels at its edge, sits on clothing or holds its color beside a neighboring metal border. The pre-production sample is your opportunity to assess those physical details before a full quantity is made. It is also the point to catch a wrong size, reversed layout, misplaced post or unclear engraving while a correction can still be made to the approved specification.
Quality has a business consequence beyond appearance. In its October 2026 article “Better Merch Is Better Marketing,” the Promotional Products Association International (PPAI) reports a survey of 257 end buyers and 250 agency respondents. Among end buyers, 79% selected high quality as a reason branded merchandise is worth keeping, while 59% selected poor quality as a reason to discard an item. These findings cover branded merchandise broadly; they are not a badge-specific study and should not be read as a forecast for pin sales. They do, however, underline why buyers should define and review the physical quality of a branded item before approving a production run.
Sample approval also helps both sides agree on what “matches” means. Plating color can look different under warm indoor light and daylight. Enamel can be judged against a physical color reference rather than a monitor. A design with a large silhouette may need an attachment arrangement that cannot be evaluated from a front-facing proof alone. For a buyer, custom badge quality control means turning those visual expectations into a clear reference, measurement or test. If your order includes custom metal badges or metal pins, make the important expectations observable and recordable.
Know what you are approving: proof, sample and production
“Sample approval” can refer to different checkpoints. Clear badge sample approval separates design sign-off from permission to make the full order. Name the checkpoint in your emails and purchase documents so the production team knows exactly what has been authorized.
- Digital artwork proof: a drawing or rendering used to confirm layout, spelling, size callouts, color intent, front and back design, and manufacturing notes. It is efficient for finding design errors, but monitor color and simulated metal reflections are not reliable physical color standards.
- Pre-production sample: a physical item made to represent the intended construction and finish. This is the right stage to check dimensions, tactile edges, actual plating appearance, enamel, assembly and how the badge sits on the intended garment. Ask whether the sample uses the same materials and processes planned for the order.
- Production or shipment sample: a unit selected from the bulk run, or a reference unit made during production, used to assess whether the delivered lot follows the approved reference and purchase specification. It does not replace agreeing how the lot will be inspected.
For a simple design, a carefully annotated proof may resolve most artwork questions. For a complex relief, multiple enamel colors, unusual plating, a large badge or a repeat order, a physical sample can reveal issues a 3D preview hides. The site’s metal badge manufacturing process guide explains where artwork review, forming, plating, color filling, assembly and inspection fit in the production sequence.
Prepare a fair and repeatable inspection
Before a metal badge sample inspection, collect the exact files and notes that define the order: approved artwork and revision, dimensioned drawing, quote or purchase order, chosen metal and finish, color references, attachment, packaging details and the sample itself. If you compare the sample with an old email image while the supplier is working from a newer drawing, you can accidentally approve the wrong version.
- Identify the sample. Record the supplier, design name or SKU, sample date, revision, finish and whether it is a pre-production sample. Photograph the front and back beside a ruler or caliper for context.
- Use consistent conditions. Inspect the item dry and clean under neutral, steady lighting. For colors, compare it with the agreed physical color reference where one exists. Avoid deciding a subtle plating or color difference under mixed warm and cool lights.
- Use simple measuring tools. A ruler or caliper can check dimensions and thickness at the agreed measurement points. Use the same orientation and points named on the drawing. A caliper reading is useful only when both parties know whether the measurement includes a raised rim, post or other feature.
- Test the actual use. Attach the badge to a representative garment, uniform panel or display material. Check the position, stability and comfort in the way the recipient will use it. Do not substitute a paper mockup for the actual backing test.
- Keep an evidence trail. Mark each comment with a photo number, drawing callout or location such as “reverse, upper-left post.” Save the approved proof and the written decision in one order folder.
If your dimensions or thickness are still open, first review the custom metal badge size and thickness guide. If the finish is undecided, compare real examples and the options in the gold, silver and antique plating guide before treating a monitor image as a standard.
The 12-point custom metal badge quality checklist
Work through the following checkpoints in order. The goal is not to search for microscopic flaws without context. It is to verify that the item matches the design, performs its intended function and meets the acceptance criteria agreed for this order.
1. Artwork, orientation and design revision
Confirm that the sample matches the final approved design revision. Check front and back orientation, logo direction, text, date, spelling, icon placement, border shape and any mirrored elements. Compare it to the dimensioned proof rather than relying on memory. For several versions, verify the correct artwork is paired with the correct sample and backing card. An older logo or a reversed mark is a major mismatch even if the metalwork looks excellent.
2. Overall width, height and thickness
Measure the finished badge at the points identified on the drawing. Check width, height and, when specified, thickness. State whether the dimension refers to the outermost edge and whether raised details are included. Flexible expectations like “about one inch” can be interpreted differently; use a stated target and an agreed tolerance. Do not invent a tolerance after receiving a sample. If the size is outside the documented limit, photograph the measurement and ask the supplier to explain before approval.
3. Outline, corners and edge finish
Inspect the silhouette from the front and side. Look for burrs, sharp points, rough cut edges, dents, bent corners or visible tooling marks that affect appearance or safe handling. Run a fingertip gently around the edge without scraping the surface. For a die-struck or cast badge, distinguish intended texture from unintended roughness by checking it against the drawing or a finish reference. The edge should be suitable for normal handling and the garment or use stated in the brief.
4. Relief, borders and fine details
Check whether raised and recessed areas are present where intended, whether borders are continuous, and whether small lettering or narrow metal lines remain legible at the finished size. A render may exaggerate depth. Tilt the physical sample under light and inspect the front at normal viewing distance as well as close up. Ask for clarification if a detail has been simplified or merged during production review. For raised or recessed styles, document which changes were approved so a later reorder does not rely on guesswork.
5. Plating color, coverage and consistency
Compare the actual plating with the selected finish name and reference. Look for uneven color, exposed base metal, missed coverage, obvious stains, pits, scratches or plating on an area that should remain unplated. Rotate the badge to see how the finish changes under light; a mirror-polished surface naturally reflects its surroundings, while an antique finish intentionally darkens recessed areas. Ask the manufacturer how finish variation is controlled for the selected process. If color is critical to brand matching, agree on a physical standard and acceptable range rather than approving from a screen alone.
6. Enamel fill, boundaries and color match
For enamel badges, check that each color is in its intended compartment and that the boundaries are clean. Look for bubbles, pinholes, gaps, overflow, contamination or a fill level that differs from the agreed style. Soft enamel commonly leaves color below raised metal lines; hard enamel is polished closer to the metal surface. The expected surface depends on the ordered process, so review the sample against the chosen construction and the site’s soft vs. hard enamel guide. Compare color with a physical reference where required; screen previews are affected by display calibration and lighting.
7. Surface, polish and visible marks
Inspect for scratches, dents, residue, fingerprints trapped under a coating, polishing haze and unwanted tool marks. Check both the large flat areas and the spaces around raised details. Judge defects from a normal viewing distance first, then inspect close enough to identify the cause. Write down the distance, lighting or location if an issue is hard to see in a photo. A photograph helps communicate the concern, but the physical sample and agreed inspection conditions remain the reference.
8. Reverse side, engraving and post placement
Turn the badge over. Verify any logo, serial number, text, texture or maker’s mark on the reverse. Check that the post, clutch, magnet or other attachment is in the agreed position and does not protrude in a way that interferes with wear or packaging. For more than one post, check the spacing and alignment against the drawing. If a pin backs onto a garment, confirm that the reverse hardware does not cover important engraving or cause the badge to sit at an angle.
9. Attachment security and intended use
Test the selected attachment by installing and removing it as intended. Check that the clutch fits the post, the locking mechanism engages if included, and the badge remains stable when gently handled. Attach it to a representative fabric or panel and observe whether it rotates, sags, pulls the material or leaves an unsuitable puncture. Do not set an arbitrary force requirement unless it has been agreed and measured with a defined method. Compare options in the metal pin backing types guide when the current fastening does not suit the badge size, weight or use.
10. Weight, balance and wear comfort
Hold and wear the badge in the position described by the brief. A broad or heavy badge may tilt on a light fabric even when its front looks correct. Check whether one post is sufficient, whether two posts keep the piece level, and whether the backing is comfortable and secure. Record the garment or material used for the check because a thick uniform and a soft knit behave differently. If the item is intended for display rather than clothing, assess the stand, magnet or mounting system instead.
11. Design variants, count and packaging
If the order includes multiple colors, names, departments or versions, inspect one clearly identified sample of each specified variant. Confirm labels, backing cards, protective film, sleeves, boxes, barcode position and packing orientation. Check whether packaging rubs against a polished face or presses on the post. Confirm that text and quantity on the label match the product variant. If packaging is part of the retail presentation, approve it as a component of the sample rather than treating it as a last-minute accessory.
12. Sample condition and approval documentation
Before sign-off, make sure the physical sample you inspected is the same sample identified in the approval email or record. Note any deviations the buyer accepts, such as an agreed color adjustment or a revised attachment position. If the supplier needs to change tooling, finish or assembly after approval, ask whether another sample or updated proof is required. Keep a dated photo of the approved front, back and any critical feature. Approval should name the design, revision, finish and authorized person, not simply say “looks good.”
How to decide: approve, revise or reject
Use the purchase specification and approved drawing to make the decision. A practical internal triage can help organize comments, but it is not a universal industry defect standard. Agree the classifications and acceptance rules with the supplier before production if they will be used to decide whether a batch passes.
- Stop and correct before approval: wrong artwork or text, wrong design variant, a missing feature, incorrect dimensions outside the agreed tolerance, a loose or misplaced attachment, unsafe sharp edges, or a finish/color that conflicts with the stated requirement. These issues affect identity, fit, function or a critical brand requirement.
- Clarify and document: a small finish difference, a detail that is difficult to judge under available lighting, or a proposed production adjustment. Ask for a photo, measurement, physical reference or revised proof. If the buyer accepts a deviation, record exactly what is accepted and whether the same appearance is expected across the order.
- Approve: the sample meets the agreed specification, all required variants and attachments have been checked, and no unresolved issue could change the buyer’s decision. Record the approved revision and release instruction.
When requesting a correction, avoid “please improve the quality.” State what is wrong, where it appears and what result is expected. For example: “On sample B-02, the blue enamel in the upper-left field appears lighter than the signed physical color chip under neutral daylight. Please confirm whether the batch can match that chip, and send a revised physical sample before production.” This gives the production team an actionable instruction and preserves a clear reference.
Copyable sample approval record
Use this compact record in an email, purchase order or quality document. Add a marked-up drawing or photographs when a note depends on exact location.
Order / PO:
Buyer and supplier:
Badge name or SKU / quantity:
Artwork revision and proof date:
Sample ID / sample date:
Metal, plating, enamel and attachment:
Target dimensions and agreed tolerance:
Packaging and labeling reference:
Inspection conditions / garment tested:
Result: APPROVED / REVISE / REJECTED
Open deviations and accepted exceptions:
Correction owner and next review date:
Production release authorized by / date:
Approved sample photos or file location:
For repeated orders, identify the approved sample as a controlled reference and note any later changes to artwork, material, finish, attachment or packaging. If the product is re-ordered months later, verify that the supplier still has the same specification and can reproduce the agreed finish. A quote can change when dimensions, quantity, finish, packing or tooling assumptions change; use the custom metal badge pricing guide to understand which details to keep consistent when comparing revisions.
Sample approval is not the same as bulk inspection
A pre-production sample answers, “Is this the product we intended to order?” A lot inspection answers, “Does the production quantity meet the agreed acceptance rules?” One approved sample cannot prove that every finished unit is identical. If the order is large, time-critical or brand-sensitive, write down how production will be monitored: which characteristics are measured, who inspects them, when the inspection occurs, what sample is selected from the lot, how defects are recorded, and what happens if the agreed criteria are not met.
Do not assume that “AQL” is a single pass percentage or an automatic quality guarantee. The official ISO 2859-1:2026 listing describes sampling schemes indexed by acceptance quality limit for lot-by-lot inspection. Such a scheme requires defined sampling rules and criteria; it does not replace the product drawing or state that every unit in an accepted lot is defect-free. The standard is a technical reference, and buyers should agree with their supplier which edition, inspection level, defect classes and acceptance numbers apply before relying on it.
For a smaller custom run, a buyer and manufacturer may agree to inspect all pieces or to use a simpler documented check. Choose a method that fits the order’s size, risk, available time and intended use. Whatever method you choose, distinguish visual defects from measurable requirements and specify whether the inspection concerns the sample, the finished lot or both.
Five sample approval mistakes to avoid
- Approving only a digital mockup. A render is useful for layout, not actual plating color, surface feel, edge quality or attachment performance. Use a physical sample when those points matter.
- Giving subjective feedback without a reference. “Make it shinier” or “the color feels off” does not say which area, standard or lighting condition applies. Add a marked photo, sample chip, finish code or measurable request.
- Reviewing the front and ignoring the back. Post placement, engraving, clutches and packaging contact can affect function and presentation. Inspect both sides and test the attachment.
- Assuming approval covers every variant and every production rule. Inspect the versions included in the order and separately agree the bulk inspection or defect handling plan.
- Changing details after sign-off without a new record. If artwork, dimensions, plating, enamel, attachment or packaging changes, issue a new revision and identify whether a revised proof or sample must be approved.
If you are still choosing a factory, ask how it handles artwork revisions, physical samples, buyer comments, production release and inspection reports. The guide to where to get custom badges made includes questions for comparing manufacturers. When your drawing, finish and quantity are ready, send the specification through the quote request form so the supplier can review the same requirements you plan to approve.
Frequently asked questions
What should I check on a custom metal badge sample?
Compare it with the latest approved artwork and written specification. Check design and orientation, dimensions, outline and edges, relief, plating, enamel colors and fills, surface condition, reverse details, attachment position and function, garment fit, packaging and sample identification. Record the result and deviations before production is released.
Does approving a badge sample guarantee every production badge will be identical?
No. The approved sample is a physical reference for the intended design and workmanship, while production and finishing can show variation. Specify important dimensions, colors, finish, tolerances and inspection criteria. Agree separately how the production lot will be checked and how a nonconforming result will be handled.
Should I approve a digital proof or a physical badge sample?
A digital proof is useful for checking layout, wording, dimensions and design intent. A physical sample lets you assess real color, metal reflection, thickness, edges, weight and attachment. For complex or high-visibility badges, review both and write down which proof and physical sample form the final reference.
What does AQL mean for a badge order?
AQL is used in acceptance-sampling schemes to make a decision about a lot from an inspected sample under agreed rules. It is not a universal guarantee that a set percentage of a shipment will be good, nor does it replace the specification. If you want statistical lot inspection, agree on the standard, sampling level, defect definitions and acceptance criteria before production.
What if the sample is close but not correct?
Pause approval and send a specific correction. Identify the location, state what it should match and attach a marked-up photo, drawing callout or physical reference. Ask whether a revised proof or new physical sample will be sent, and record the new revision before authorizing bulk production.
Who should sign off the sample?
The person responsible for the brand, product specification or purchase approval should sign off, with input from design, procurement or end users when relevant. The approval record should identify the reviewer, date, design revision, sample ID, approved exceptions and release decision.
Sources and further reading
- PPAI, “Better Merch Is Better Marketing” (October 1, 2026) — survey context and buyer responses on quality and why people keep or discard branded merchandise. These are category-wide findings, not badge-specific statistics.
- ISO 2859-1:2026, Sampling procedures for inspection by attributes — official standard listing for acceptance-sampling schemes indexed by AQL in lot-by-lot inspection.
- American Society for Quality (ASQ), ANSI/ASQ Z1.4 and Z1.9 overview — an overview of acceptance-sampling standards and their use with specified sampling rules.
Editorial note: The inspection steps are practical buyer guidance, not a substitute for an order-specific specification, accredited testing or a sampling plan agreed by both parties. Confirm product tolerances, finish expectations and lot acceptance rules with the manufacturer before releasing production.