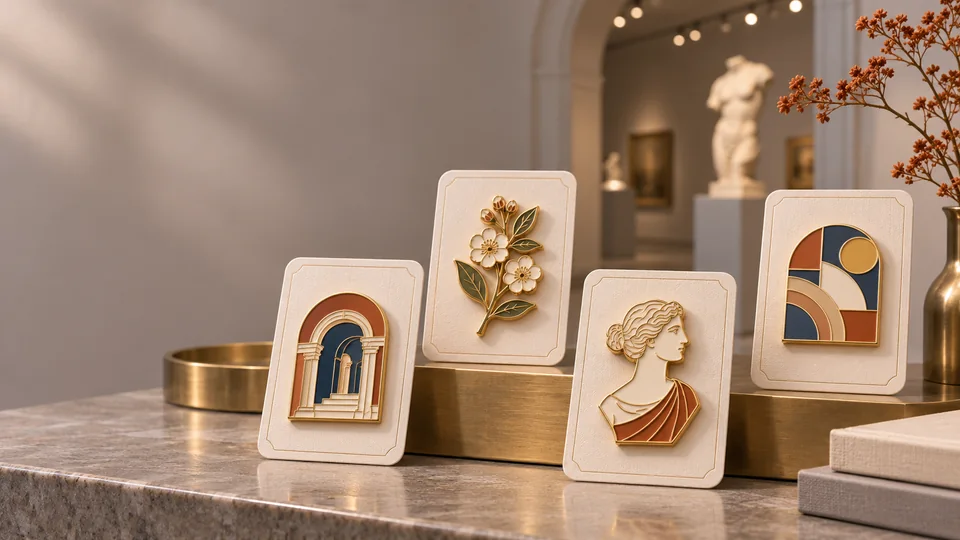
Short answer: plan custom museum pins as small retail products rooted in a specific story. Decide what the visitor should remember, select an image or detail the museum is allowed to reproduce, simplify it for the final pin size, choose a suitable metal and enamel method, and package it with enough context to connect the object to the visit. Before ordering, approve the actual dimensions, finish, attachment, card, SKU and a production sample where appropriate.
Why story-led museum merchandise matters
Museum and gallery retail is increasingly treated as part of the cultural experience rather than a row of generic souvenirs at the exit. A May 2026 Guardian report described museum shops using curated products to interpret exhibitions and attract visitors as shopping destinations. It noted that the Victoria and Albert Museum reported £1.1 million in merchandise sales over seven weeks around its Taylor Swift exhibition, with tote bags and button badges among the products. That figure belongs to the combined merchandise program: it is not pin revenue, and the article does not isolate badge sales. The useful lesson for a buyer is about curation and connection, not a guaranteed sales forecast.
There is a second signal in buyer research. Avant Arte’s New Generation Survey 2026 surveyed 2,028 people in March 2026. It reported substantial interest in museum and gallery shop purchases among respondents under 45. The study also describes its own audience composition, including a share drawn from Avant Arte’s collector community, so it should be read as a survey of an engaged art-interested audience rather than a representative estimate of all museum visitors. It supports testing thoughtfully curated products with relevant audiences; it does not tell a museum how many enamel pins it will sell.
Broader branded-merchandise research points to product quality and design as practical decision factors. In an October 2026 study, PPAI Research surveyed 257 end buyers and 250 agency respondents. Among end buyers, 79% selected high quality as a reason branded merchandise is worth keeping, 47% chose usefulness and 46% good design. Those results cover branded merchandise across categories, not museum pins. Still, the implication for a small metal keepsake is concrete: perceived quality, relevance and design belong in the brief alongside unit cost.
Collectible pin programs also remain visible in popular culture. Disney Parks Blog’s November 2026 pin update promoted new releases, mystery-set unboxings, a live shopping event and a 2027 trading event with an event pin. This is one large brand’s program, not proof of general museum demand. It does illustrate how a pin can be connected to a story, release moment and collector interaction. A museum can borrow the planning principle—give the item a reason to exist—without copying another brand’s scale or tactics.
For a museum shop, the opportunity is to connect the design to what visitors just experienced. A thoughtful pin may serve as a wearable reminder, a compact gift, a membership thank-you or one piece of a wider exhibition range. It is not automatically a bestseller. The strongest concept is one that suits the institution, is legible at small scale, can be sold with accurate context and can be produced within the actual rights, schedule and budget.
Define the pin’s role in the visit before choosing a shape
Before drawing, write one sentence describing the job of the product. For example: “This pin lets visitors take home a recognizable detail from the botanical illustration exhibition,” or “This member gift marks the museum’s new architecture gallery.” A clear role makes later decisions easier: subject, price tier, finish, packaging, quantity and even where the pin appears in the shop.
Then identify the likely buyer and moment of purchase. A family buying a small keepsake after a weekend visit may respond to a friendly, instantly recognizable motif. A design-focused visitor may value a subtle visual reference or artist collaboration. A member gift might need a more formal card and a clear date or edition identifier. An online customer who did not attend the exhibition may need more explanation in the product listing. These are planning hypotheses to validate with the shop’s own customer and sales data, not universal rules about visitor behavior.
Separate three product roles if the program needs them:
- Core souvenir: the most immediately recognizable symbol, sized and priced for broad visitor appeal.
- Design-led item: a more detailed or distinctive interpretation for visitors who engage deeply with the exhibition or artist.
- Institutional keepsake: a museum, building or collection motif that can remain relevant beyond a temporary show.
You may only need one design. A collection of variants is useful when each has a clear reason to exist and the shop can manage the extra SKU, approval, stock and photography work. Avoid adding colorways simply to make a range look larger. For a broader overview of formats, compare the site’s custom metal pins and custom lapel pins.
Turn an exhibition story into a clear, wearable design
A small pin has limited visual space. The aim is not to reduce an entire exhibition to a tiny picture; it is to choose one memorable idea that can survive simplification. Curators, designers and retail buyers can use three useful starting points:
- Choose an object or silhouette. Select a recognizable artifact, specimen, tool, instrument, building feature or abstract form. A strong outline often reads faster than a miniature scene with many objects.
- Borrow the exhibition’s visual language. Use an approved palette, repeated shape, frame, pattern or material reference. This creates a connection to the show without simply printing a poster image onto metal.
- Build a small narrative detail. A key, window, leaf, star, fragment of a map or tool can reward visitors who remember a particular gallery moment. Add just enough context on the card for the reference to make sense.
Ask the design team to prepare a pin-scale version, not only a resized poster. Remove details that will close up when plated or filled with enamel. Keep lettering minimal and large enough to read, avoid hairline gaps, and test the silhouette at its actual physical dimensions. A useful review question is: can someone identify the main shape from arm’s length, and does the smaller detail still look intentional up close?
Plan front and reverse as one product. The front carries the visual story. The reverse can hold a discreet institution name, year, edition mark or manufacturer detail if approved. Check that the attachment is positioned for balance and that it will not cover an important feature. Product weight, thickness and size affect comfort as well as appearance, so request the actual dimensions and attachment recommendation before approving artwork.
Confirm artwork rights, permissions and credits early
Museum collections bring complex image and attribution questions. A work may be in the public domain while a particular photograph, digital scan, logo, modern exhibition graphic or artist-created adaptation has separate terms. A museum’s right to display or reproduce an image in a publication does not necessarily include manufacturing and selling it as a pin. Confirm what is permitted for the specific product, territory, sales channel, quantity and dates.
Make a rights checklist before commissioning final art:
- Identify the rights holder for the artwork, photograph, design, trademark, artist name and any partner marks.
- Check that the permission covers metal pins or merchandise, and covers both in-person and online sales if both are planned.
- Confirm required credit lines, copyright notices, logo placement, edition wording and packaging language.
- Record who approves the concept, production artwork, sample and backing card, plus the expected review time.
- Give the manufacturer approved production files and written instructions for marks, colors and permitted use.
For a co-created item, agree on credit and approval responsibilities with the artist before production begins. Specify whether the artist’s name appears on the card, product page or both, and who signs off on final color and finish. For licensed collaborations, follow the exact program requirements; our licensed custom metal pins guide covers rights scope and controlled approval workflows in more detail. This article is production planning, not legal advice.
Choose metal and enamel construction to support the artwork
The right construction depends on the visual treatment, target size, tactile effect and production budget. Begin with a clear image of the finished front rather than choosing a process by name alone.
- Soft enamel: raised metal borders divide color areas, while the enamel sits slightly below the metal. It can suit bright, clearly separated colors and designs where a tactile surface is welcome.
- Hard enamel: the filled and polished face is smoother and closer to the height of the metal lines. It can work well for a refined retail finish, provided the artwork’s divisions and small features suit the process.
- Die-struck metal: relief, texture and plating carry the design without broad enamel fills. This can suit architectural detail, a seal-like emblem or an object whose material character matters more than color.
- Printed or mixed processes: printing may preserve fine imagery or gradients that are difficult to represent with separate enamel cells. Ask to review a sample or production-representative proof because the look differs from a flat screen image.
Map each major color and line to a manufacturable area. If a design uses a historic painting or photographic detail, a direct reproduction may lose subtle shading at pin scale. A simplified silhouette, selected color bands or a raised frame around one key element can create a stronger result. Check the soft vs. hard enamel pin comparison and metal pin materials guide while preparing a specification.
Choose a plating color that supports the exhibition palette and remains consistent across the front, edge and reverse. Polished gold can feel warm and decorative; antique finishes emphasize recesses and relief; silver or nickel can give a cooler look. The final sample matters because lighting, plating and enamel can appear different from a monitor rendering. Review gold, silver and antique plating options before locking the finish.
For a wearable souvenir, decide how it will attach to clothing, a bag or a display board. A single post may suit a compact lightweight shape; a larger or heavier form may need two attachment points to reduce rotation. Select the clutch with the customer and use case in mind, and make sure the pin does not tip or snag. The metal pin backing guide explains common attachment choices. Confirm backing dimensions and finished thickness on the order specification.
Plan a retail assortment that is easy to understand and manage
For an exhibition with several possible references, build the assortment around a small number of distinct roles rather than producing many near-duplicates. One anchor design can lead the range; a second can offer a different visual or price point; an institution-wide motif may stay available after the exhibition closes. Each item should be recognizable in a display and clearly differentiated in a stock system.
For every SKU, write down:
- Design name and one-sentence connection to the exhibition or collection.
- Approved artwork revision, dimensions, construction, plating, enamel colors and attachment.
- Backing-card version, barcode, package type and any edition or artist credit.
- Order quantity, location or channel, launch date and reorder decision date.
- Photography requirements and online product description.
Do not use “limited edition” as a decorative phrase. If you make an edition claim, define what is limited, how many are made, whether online stock is included and whether a later reissue is possible. If the intent is simply to sell a temporary exhibition product, say that it is an exhibition design rather than implying a fixed edition. Clear descriptions protect customer trust and make future reorders easier to manage.
A backing card gives the product room to tell the story without crowding the pin. It can name the exhibition, identify the subject in a sentence, credit the artist where approved, display the museum’s identity and provide the retail barcode. Use legible type and contrast; keep required legal text separate from the visitor-facing description. If the pin is mounted on card, test the hole or slot position, pin security and package fit using the actual attachment.
Make the packaging and online listing part of the product
Packaging protects the pin and provides context at the moment of purchase. A good backing card answers three quick questions: what is the design, how does it relate to the exhibition, and who made or authorized it? A compact sentence can make an abstract reference more satisfying without turning the package into a wall label. Confirm all names, credits, dates, translations and trademark lines before print.
Choose packaging that matches how the item will be displayed and shipped. A card may be enough for a straightforward pin; a set, fragile attachment or premium gift may need a protective sleeve or box. Keep the package size practical for shop fixtures and online fulfillment. Ask the retailer or museum store team about barcode format, SKU placement, hanging requirements, inventory labels and shipment packing before artwork approval. If packaging is part of a sustainability claim, document what the material actually is and avoid broad claims that cannot be substantiated.
For an online store, use clear photographs of the front, back, scale and package. Show the real finish in neutral lighting and provide dimensions in both familiar units if customers are international. Name the subject plainly and add a short explanation of its exhibition connection. Include the material or construction only when confirmed by the supplier. A QR code on a card can point to a collection page or audio guide, but it should supplement rather than replace information the customer needs to understand the product at purchase.
Online and physical retail may have different approval and fulfillment needs. Check that the image rights allow digital product photography and promotional use, that web inventory matches shop inventory, and that a pin will be available for the dates it is advertised. If a launch uses a live reveal, event, or collector interaction, make sure stock, release rules, product details and customer support are ready before promoting it. Disney’s 2026 pin activity is a current example of one brand connecting products with live content and trading events; smaller institutions can adapt the idea at a scale that fits their audience and resources.
Forecast quantities, cost and launch timing with the shop team
There is no universal “right” quantity for a museum enamel pin. Start with evidence available to the institution: comparable exhibition products, prior pin sell-through, expected attendance, online audience, shop conversion, membership distribution, seasonality and the exhibition’s run. Use separate estimates for each design rather than applying one number to a whole collection. If the museum has no comparable sales history, document assumptions and make a conservative, base and high scenario.
Account for the manufacturer’s minimum order quantity, tooling or setup charges, packaging, inspection, freight, import costs where relevant, storage and the timing of any reorder. Ask whether variants can share tooling or be made in one production plan, and whether artwork or packaging changes would create additional cost. Compare total landed cost with the retail price and the shop’s own margin requirements. Our custom enamel pin cost guide and metal badge pricing guide explain common manufacturing cost drivers; the museum should model its own retail economics.
Use a simple sell-through measure after launch: units sold divided by units made available for sale during the period, expressed as a percentage. Record returns, damaged stock, staff or member allocations and online orders consistently so the number can be compared across designs. Review sales at agreed intervals, such as after launch, halfway through the exhibition and before the final reorder window. Pair the number with qualitative feedback: which design visitors recognize, what questions they ask and whether the online description helps them choose.
Work backward from the date stock must be in hand. A practical schedule includes the creative brief, rights check, concept, production artwork, approval rounds, digital proof, physical sample if required, packaging proof, bulk approval, manufacturing, freight and receiving inspection. Museum or partner approvals can take longer than manufacturing itself, so assign an owner and target date to every review. Ask for an order-specific schedule; avoid treating a generic supplier lead time as a delivery promise.
Approve a real sample and define what “match” means
A digital proof is useful for reviewing the layout, text, dimensions and color placement, but it cannot fully show the physical shine, relief, weight, edge, attachment or feel. For a new design, an artist collaboration, a premium finish or a time-sensitive exhibition, budget time for a production-representative sample. If the project requires licensor or curator approval, identify who must sign off before the bulk order begins.
Compare the sample with the approved brief and record the outcome. Inspect the overall shape and size; check that small openings remain clear; verify the metal finish, enamel placement, color relationships, edge and reverse; test the attachment; and examine the pin on its actual backing card. Confirm the product code, legal copy, barcode and package version. If a change is needed, mark it on the artwork, assign a new revision and approve the corrected version explicitly.
Keep a reference sample or dated photographs with the purchase order, especially when multiple designs are produced together. Agree with the supplier on acceptable visual variation and how defects will be handled. The custom metal badge quality checklist can help structure the review. If the museum expects a repeat run, preserve the approved files, color references, sample notes and package artwork so the next order can be compared against a known standard.
Copyable custom museum pin project brief
Use this checklist to bring curatorial, retail, marketing, rights and production teams into the same conversation:
- Purpose: exhibition souvenir, collection product, membership gift, artist collaboration or institutional retail item.
- Audience and channel: museum shop, online shop, event, member distribution, wholesale or a combination.
- Story and concept: the visitor takeaway, subject, approved reference, visual direction and what the design should avoid.
- Rights and approvals: artwork source, rights owner, product and channel permission, territory, term, credit, required notices and named approvers.
- Product specification: target size, thickness, relief, enamel or print method, plating, attachment, reverse detail and package format.
- SKU and quantity: design names, quantity per design, barcode, launch date, reorder trigger and any accurate edition statement.
- Retail details: target retail price, landed-cost assumptions, card copy, display needs, product photography and web listing owner.
- Quality and schedule: proof rounds, physical sample, inspection points, approved reference, bulk release owner and in-hand deadline.
Once the brief is aligned, share the approved artwork, target dimensions, construction, quantities by design, backing-card requirements and delivery location with the manufacturer. If the project is ready for a production discussion, use the quote request page to outline the scope. Specific information helps the factory review manufacturability and provide a more useful estimate.
Frequently asked questions
What makes a good museum gift shop pin?
A good museum gift shop pin connects clearly to a collection, building, artist or exhibition while remaining legible at its actual size. It should feel appropriate for the visitor, have a suitable finish and attachment, and arrive with packaging that explains the reference without overwhelming the design.
Can a museum put a famous artwork on an enamel pin?
Only if it has permission for that specific product and use or has confirmed that the work and relevant reproduction assets can be used. Check the artwork, photograph, exhibition identity, artist name, museum marks and partner rights. Permissions for display or a printed catalogue do not automatically cover merchandise.
Which construction is best for custom exhibition pins?
Soft enamel, hard enamel, die-struck metal and printed or mixed constructions each create a different look. Choose based on the approved artwork, final size, desired surface and cost. Review a production proof and request a physical sample when the finish or detail is difficult to judge on screen.
What size should museum pins be?
There is no single ideal size. Choose a dimension that preserves the silhouette and key color areas, then test it at actual scale. Fine details and small lettering may need to be removed or enlarged. Check weight and attachment position as well as the front view.
How can a museum estimate pin quantities?
Use attendance expectations, comparable shop sales, online reach, membership plans, exhibition dates, minimum order requirements, reorder lead time and storage limits. Build a few scenarios for each design and update them with the museum’s own sell-through data after launch.
How long does it take to make custom museum pins?
Timing depends on design readiness, permissions, approval rounds, sample requirements, construction, order size, packaging and shipping. Work backward from the in-hand date, include approval and freight time, and ask the supplier to confirm a dated schedule for the actual order.
Research and references
- The Guardian, “From bikinis to cat bowls: how museum gift stores became the place to shop” (May 31, 2026) — reporting on curated museum retail and examples of exhibition merchandise. Its V&A figure covers merchandise including tote bags and button badges together, not pin sales alone.
- Avant Arte, New Generation Survey 2026 — survey of 2,028 respondents conducted in March 2026, including findings about museum and gallery shop purchases. The report describes an art-engaged sample; it is not a representative survey of all museum visitors.
- PPAI Research, “Better Merch Is Better Marketing” (October 1, 2026) — survey of 257 end buyers and 250 agency respondents about branded merchandise. Findings are cross-category and should not be read as museum-pin-specific demand.
- Disney Parks Blog, “Latest Disney Trading Pin Releases, Events, and News” (November 10, 2026) — an example of one brand combining pin releases, live shopping content and an announced collector event; not a market-wide benchmark.
Editorial note: These sources offer context about museum retail, art-engaged shoppers, general branded merchandise and one established collector program. None establishes the size, growth rate or sales forecast for custom metal museum pins. Use institution-specific visitor and retail data to validate a product plan.