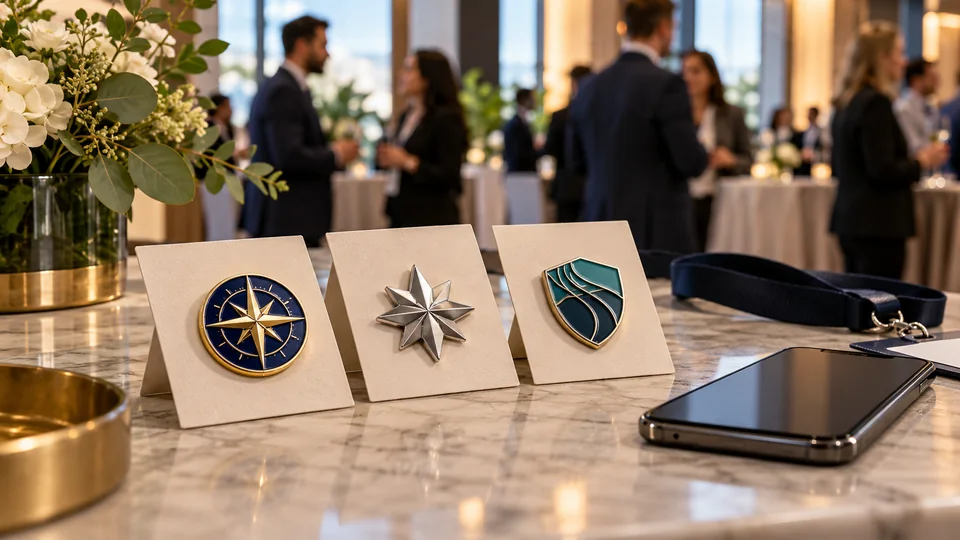
Short answer: use custom event lapel pins as a wearable keepsake and a purposeful event touchpoint. Start with one goal—such as attendee appreciation, community building, booth conversations or post-event follow-up—then create a design people can recognize and want to keep. If you add a QR or NFC interaction, connect it to a fast, useful mobile destination and decide in advance how you will measure results. A pin can support an experience; it cannot guarantee attendance, scans or sales by itself.
Why event teams are rethinking branded merchandise
Event teams are being asked to make physical experiences memorable and explain what those experiences accomplished. In its October 2026 “Better Merch Is Better Marketing” research article, the Promotional Products Association International (PPAI) reports a survey of 257 end buyers and 250 agency respondents. Among end buyers, 47% said they measure event engagement, and 55% wanted to measure return on investment better. The study covers branded merchandise broadly, not event lapel pins specifically. It is a useful signal about buyer priorities, not proof that pins outperform other products.
That distinction points to a practical opportunity for a metal badge manufacturer and an event buyer: plan the pin as one part of the event experience instead of treating it as an isolated giveaway. The item should fit the audience, feel worth keeping and have a clear role in a campaign—whether that role is recognition, conversation, collection or follow-up.
Event trends reinforce the need to earn attention. BCD Meetings & Events’ 2027 meetings and events trends overview highlights meaningful interaction, attendee trust and aligning event design and measurement with business priorities. This is broad event-planning guidance rather than a study of merchandise. Applied to custom conference pins, it suggests that a product idea should give attendees a reason to participate or remember—not simply add another branded object to a bag.
PPAI’s 2026 strategic outlook also describes connecting physical and digital experiences through options such as QR or NFC technology. That makes a lapel pin an interesting creative starting point, but the interaction needs to be convenient and relevant. The digital destination, call to action and measurement plan are part of the experience; adding a code or chip alone does not make a campaign effective.
What a custom metal lapel pin can do at an event
A decorative lapel pin is a small format, which is both a limitation and a strength. It has little room for dense copy, yet it can carry a memorable shape, symbol, color combination or event motif that attendees wear, trade or keep. Metal, enamel and relief can make the piece feel more like a compact keepsake than a disposable paper item. The effect depends on design quality and audience fit; no material automatically makes a giveaway valuable.
- Recognition: thank speakers, volunteers, sponsors, employees or returning members with a design tied to a real contribution or milestone.
- Conversation: use a distinctive visual motif as a natural opening for a booth conversation or a shared event theme.
- Collection: create a small, clearly differentiated series for event days, tracks or locations when attendees have a genuine reason to collect or exchange them.
- Memory: connect the artwork to a talk, launch, community or place so the pin can recall the experience after attendees leave.
- Follow-up: pair the pin with a backing card or package that leads to event resources, a recap page, a product demo or an optional feedback form.
Keep the product role clear. This guide covers decorative custom event lapel pins and collectible metal badges, not attendee credentials, access-control badges or safety identification. If an item needs a printed name, scannable admission credential, security feature or high-visibility ID, design and specify that functional badge separately. For standard corporate event purchasing and material choices, see the site’s custom metal badges for corporate events buyer’s guide.
A six-step plan for custom event lapel pins
Step 1: Write down the event outcome
Before choosing a shape or finish, state what the pin should help the event team do. “Raise awareness” is a starting point, but it is too broad to guide distribution or measurement. Try a specific objective such as: encourage visitors to complete a product demonstration; recognize a defined group of volunteer leaders; prompt attendees to explore three conference tracks; or give customers a useful event recap after the show.
Choose one primary outcome and one secondary outcome at most. If the brief expects the same pin to drive booth traffic, collect emails, reward participation, promote a sponsor and act as a membership credential, attendees may find the experience confusing. A focused pin concept is easier to design, explain and evaluate.
Step 2: Define who receives the pin and why
Describe the recipient, not just the buyer. Is this for customers, employees, prospects, community members, speakers or every attendee? Will the pin be handed out at registration, at a booth, after a session or inside a post-event kit? The setting changes the suitable size, quantity, packaging and message.
Ask whether the audience would wear, collect or display the design. If they are unlikely to wear it, a display card or keepsake package might matter more than a particular backing. If the pin is intended to be worn throughout a conference, weight, edge comfort and attachment should be tested against a representative garment. The guide to metal pin backing types explains common attachment options and their tradeoffs.
Step 3: Build one visual idea attendees can recognize
Event artwork has to work at actual size. Choose a clear silhouette and one strong visual idea, then simplify small text, thin lines and complex gradients that may not reproduce as expected in metal and enamel. A conference track can be represented by a color and symbol; a company anniversary can be expressed through a meaningful date or emblem; a sponsor activation can use a co-branded shape with agreed brand hierarchy.
For a series, make each piece distinct enough to identify and consistent enough to belong together. Use a shared border, edge treatment or base palette, then change one visual element per edition. Decide whether each piece is available to everyone or earned through an activity. Scarcity should be truthful and manageable: do not promise a limited collectible if organizers cannot control inventory or distribution.
Consider the pin’s context with the rest of the campaign. A small mark can feel more wearable than a large advertisement; restrained branding can coexist with a recognizable event motif. Confirm that logos, licensed artwork and sponsor marks are approved for use before production. For finish and color decisions, review the site’s plating comparison guide and soft versus hard enamel guide.
Step 4: Give the pin a simple activation mechanic
A mechanic is the small action that connects receiving the item to the event. It should be easy to understand in a few seconds. Examples include picking a pin that represents a session track, exchanging designs with another attendee, receiving a second version after a product demonstration, or taking a pin card with a link to the event recap.
Make participation optional and proportional to the value offered. Do not force attendees to submit unnecessary personal information to receive a modest item. If the experience collects information, explain what the attendee gets in return and what will happen next. For sponsor programs, specify who owns the follow-up and how any contact request is handled.
Step 5: Design the digital destination before printing a code
If you plan to use QR or NFC, build the destination page first. It should load quickly on a phone, explain why the attendee arrived, and present one obvious next step. Depending on the event, that might be the session notes, a product demo, a speaker resource, a photo gallery, a post-event survey or a voluntary request for contact. Test the full journey on common phones and on the venue’s expected network conditions.
Do not assume that a QR code printed on a tiny badge face is the best placement. A reflective metal surface, curved edge, small available area or low contrast can make a code harder to scan and can weaken the design. A backing card, sleeve or package usually provides more room for a legible code and a short explanation. If you want NFC, work with the supplier and the event team to validate the chip, reader behavior, phone compatibility, placement and target URL before committing. These are implementation choices to test, not guaranteed capabilities of every metal pin.
Step 6: Agree the measurement plan before the event
Decide how the team will know whether the pin supported the goal. Assign an owner to collect the data, choose a reporting window and set a baseline or target if comparable information exists. A QR scan count can tell you that some people opened a page; it does not show that they read it, remembered the brand or became customers. A pin distribution count measures reach at the handoff, not sustained use.
Three illustrative event pin activation ideas
The examples below are planning concepts, not published customer case studies. Adapt them to the audience, event rules and campaign objective.
Conference tracks: a wearable map
Create three related symbols for three conference tracks. Offer a card that explains the design and links to the relevant session collection. The pin may help attendees signal an interest or start conversations with people from another track. Measure the number of each version distributed, visits to the session resource pages and feedback from attendees. Do not assume that a person who wears a symbol attended every session in that track.
Trade show booth: a reason to return
Produce a compact series tied to a product family or campaign theme, with one version available after a short, useful demonstration. Give visitors a clear explanation and let them decline without pressure. Track booth conversations and qualified leads using the event team’s existing process; use an optional QR page for product specifications or an appointment request. Compare outcomes with previous booth activity if the format and audience are similar.
Customer or employee summit: a recognition token
Design a pin around a shared milestone or community identity. Present it in a backing card that names the event and provides a link to a photo gallery, internal resource or thank-you message. The objective may be appreciation and recall rather than lead generation. Ask recipients after the event whether they kept or wore the piece and what they remember about the gathering.
QR, NFC and the physical-to-digital event path
The physical item earns attention through its design and context. The digital interaction should extend that experience. A useful path has four parts:
- Prompt: a short, clear invitation on the card or package, such as “Get the session notes” or “See the event collection.”
- Access: a tested QR code or NFC touchpoint with enough room, contrast and instructions for the user to understand the action.
- Value: a fast mobile page with content that matches the prompt. Avoid sending people to a generic homepage where they must search again.
- Next step: one optional action that fits the campaign, such as viewing a demonstration, saving a resource or requesting a follow-up.
Choose the simplest technology that accomplishes the goal. A QR code is visible and familiar, but people need a camera and a reason to scan. NFC can make the interaction feel direct, but it requires compatible hardware, clear tap instructions and end-to-end testing. An unlinked or expired page turns a physical keepsake into a broken promise. Assign someone to own the destination URL and keep it useful after the event closes.
Use privacy-conscious measurement. Tell visitors what information is optional, avoid collecting data that is not needed for the stated purpose and ensure the form is usable on mobile. Where possible, report aggregate interactions rather than trying to identify individual behavior without a clear need and permission. A successful campaign should build trust alongside measurement.
How to measure custom event lapel pin engagement
PPAI’s October 2026 survey found that end buyers commonly measured budget, leads, reach and event engagement, while many wanted better ROI measurement. The broader implication is to choose metrics that match the event objective rather than force every giveaway into a sales attribution model. The table below is presented as a simple planning menu; choose only the rows that fit your campaign.
- Distribution: units delivered, recipients reached, versions handed out and remaining inventory. Useful for reach and operational planning.
- Participation: booth conversations, completed demonstrations, session resource visits or optional activity completions. Useful when the pin is linked to an event mechanic.
- Digital interaction: unique page visits, QR or NFC opens, resource downloads and voluntary follow-up requests. Use unique campaign links and a clear time window; exclude internal test scans where practical.
- Business outcomes: qualified leads, meetings booked, influenced opportunities or repeat engagement. Attribute carefully and compare with other event channels rather than assigning every outcome to the pin.
- Experience and recall: a short attendee survey, post-event feedback, or a question about whether the item was kept or worn. These signals can help improve future design, even when they do not translate directly into revenue.
A compact measurement plan might read: “Objective: help visitors explore the new product range. Primary measure: qualified booth demonstrations. Supporting measure: unique visits to the product resource page through the event card. Reporting owner: event marketing. Window: event week plus 30 days. Guardrail: report page visits separately from booked meetings.” The exact time window and target should reflect the campaign; avoid claiming a return that the available data cannot show.
Design and production planning for event pins
Campaign creativity still has to work as a manufactured object. Confirm finished width, height, thickness, base metal, plating, enamel or print method, post location, attachment, backing card and packing format. Think about where the piece will be worn, how it will be distributed and whether it must travel in a welcome kit. A large or heavy pin may need a different attachment from a small lapel piece. Refer to the size and thickness guide before approving a design at an unrealistic scale.
Request a production review before final art is locked. Small lettering, narrow metal dividers, gradients and tiny QR codes may need to be simplified or moved to the package. Ask which finishes are feasible for the selected construction and what variation to expect. If the campaign has several versions, submit a version list and check that each sample, backing card and quantity is clearly identified.
Approve the proof and physical sample against the final campaign brief. Inspect artwork, color, dimensions, edges, finish, backing and packaging. Record accepted deviations and the approved revision. The detailed custom metal badge sample approval checklist provides a practical review sequence, while the metal badge manufacturing process guide explains the production stages.
Work backward from the date the pins must be in hand. Include creative approval, sample transit and review, any revision, production, card printing, packing, freight and a contingency for delays. Lead times depend on the process, quantity, finish and destination; ask the manufacturer for a written schedule based on the actual specification. For cost planning, compare the assumptions in the custom metal badge pricing guide and send the quantity, dimensions, finish, backing and delivery date with your quote request.
Common mistakes to avoid
- Starting with the logo instead of the event goal. A logo can be part of the design, but it does not explain why an attendee should wear or keep the pin.
- Making the digital action the whole value proposition. The keepsake should still make sense if the recipient never scans or taps it.
- Printing a code too small to test. Use a physical sample and real phones, at the size and placement planned for the final card or package.
- Promising a measurable ROI from scans alone. Scans are one interaction signal; connect them to a defined outcome and explain the limits of attribution.
- Launching too many collectible variants. Extra versions complicate quantities, artwork approvals, packing and distribution. Start with the smallest series that serves the campaign.
- Ignoring wearability and packaging. Test the actual attachment and consider whether the card protects the finish and presents any digital call to action clearly.
- Leaving the landing page ownerless. Assign responsibility for the destination link, mobile testing, event-week monitoring and post-event maintenance.
Copyable event pin campaign brief
Use this checklist to align the marketing, event, procurement and production teams before requesting a quote:
- Event and date: name, location, in-hand date and distribution point.
- Audience: who receives the pin, expected quantity and any recipient segments.
- Primary objective: appreciation, recognition, community, booth engagement, recall or follow-up.
- Activation: how the pin is handed out, collected, exchanged or paired with a digital resource.
- Design: artwork, brand approvals, number of variants, target dimensions, finish and color references.
- Attachment and packing: intended garment, backing style, card or package and any printed instructions.
- Digital experience: QR or NFC placement, destination URL, mobile call to action, owner and link expiry plan.
- Measurement: one primary metric, supporting signals, reporting owner, time window and attribution limits.
- Production: sample requirement, approval deadline, quantity by version, shipping destination and contingency.
For a general overview of product choices, compare custom metal pins with the existing event-buyer guide. A complete brief helps suppliers recommend a manufacturable badge and helps the event team know what success should look like before the cartons arrive.
Frequently asked questions
How can custom lapel pins increase event engagement?
A pin can work as a wearable keepsake, conversation starter, collectible or prompt to visit an event resource. It is most useful when the design fits the audience and the distribution is tied to a simple, worthwhile activity. The pin alone does not guarantee engagement or commercial results.
Can I put a QR code directly on a metal lapel pin?
Some larger flat designs may allow it, but a very small QR code can be difficult to scan and may compromise the artwork. A backing card or package usually provides more space and contrast. Test the final printed code on a physical sample with several phones before ordering.
Should I use QR or NFC for event pins?
Choose based on the interaction, budget, compatibility and production requirements. QR is visible and easy to test on a card; NFC can support a tap interaction but requires chip and device validation. Both need a useful mobile destination and a clear call to action.
What should I measure for event pin engagement?
Match measures to the campaign goal: quantities distributed, booth conversations, completed demonstrations, unique QR visits, voluntary follow-up requests, attendee feedback or qualified leads. Treat scans as a signal of interaction rather than proof of ROI.
When should I order custom conference pins?
Start from the in-hand date and allow time for artwork review, sample approval, revisions, production, packaging and shipping. The required schedule depends on the design and destination, so request a dated production plan from the manufacturer before booking the campaign around it.
Are event lapel pins the same as attendee ID badges?
No. This article covers decorative metal pins and keepsakes. Attendee IDs and access credentials have separate requirements for names, readability, security and access control, so plan them as distinct products.
Sources and further reading
- PPAI, “Better Merch Is Better Marketing” (October 1, 2026) — survey of end buyers and agencies; includes findings on event engagement measurement and buyer interest in measuring ROI. The results are about branded merchandise overall, not metal pins.
- PPAI, “Alok Bhat: 6 Strategic Shifts Defining Branded Merchandise” (June 29, 2026) — industry outlook on campaign measurement and connecting physical and digital experiences, including QR and NFC examples.
- BCD Meetings & Events, “The Latest Meetings & Events Trends for 2027” — event-planning themes including attendee attention, meaningful interaction and strategic measurement.
Editorial note: The sources above discuss branded merchandise or events broadly and do not establish that custom lapel pins are growing faster than other promotional products. The campaign concepts in this guide are planning suggestions; validate them with your audience, event objectives and supplier before production.